Before you begin reading this article, please be aware of a few things. First, this article assumes you have a basic understanding of computer based storage. Second, all steps outlined in this article are verified for iOS 8, so if you are still on iOS 6 or iOS 7, some things may not be accurate.
In our family, my wife is the picture taker. With two young children, every outing for her is an event that needs to be captured, saved for posterity and shared with our family and friends through social media (all of which she can easily do through her iPhone 5). The convenience and simplicity of that process on iOS makes my wife REALLY happy.
There is, however, an unfortunate downside to all of her picture taking and video making. You see, my wife’s iPhone only has 16gb of storage. This means that she runs out of storage space pretty quickly. When it happens, she is forced to stop taking pictures and start managing the space on her device (which makes her REALLY unhappy).
Does this scenario sound familiar? If so, I’d like to present a brief strategy guide for managing your files a bit better and freeing up some storage space on your iOS devices so you can keep shooting photos and videos this holiday season.
Strategy #1: Manage iMessage Photos and Videos
Here is something that very few people are ever aware of: every time you receive a photo or video in iMessage, that photo or video is actually stored on your iOS device and occupies a small percentage of the usable storage space (i.e. 16/32/64/128 gb). Over time, these photos and videos slowly begin to monopolize the storage space on your device. What’s worse is that many people save photos or videos received through iMessage onto their camera roll. This practice of saving to the camera roll without removing the original file from iMessage effectively duplicates the file and decreases the amount of storage left on the device by the size of the file.
The good news is that Apple makes it really easy to manage iMessage’s impact on your storage space. The even better news is that the process (outlined below) allows for a good amount of granularity: you can choose to delete entire iMessage threads or single photos/videos within an iMessage thread. Let’s take a look at the process now:
Step 1: Find out how much space your iMessages are taking up
Go to Settings–>General–>Usage–>Storage–>Manage Storage
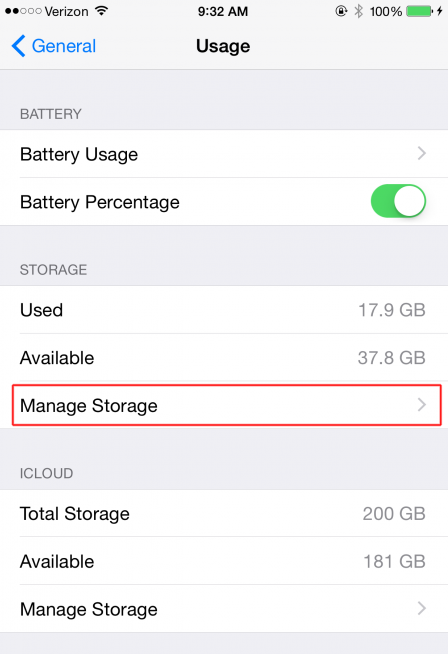
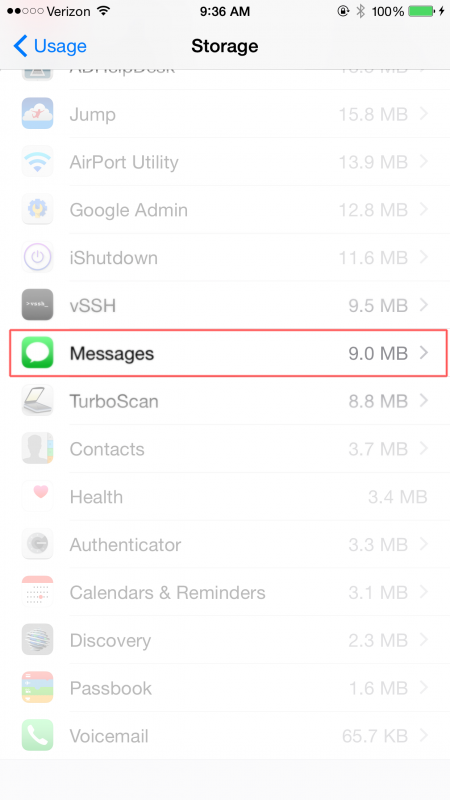
Now, scroll down until you see the “Messages” app. The amount of space your iMessages are occupying is listed to the right. To give you a basic rule of storage measurement, 1gb = 1000mb. The number listed to the right represents, theoretically at least, the maximum amount of space you’ll be able to reclaim in the next few steps.
Step 2: Clean up iMessage threads and reclaim storage space
Here is the part where you are going to have to make a few decisions about how much you need to keep those space hogging iMessage threads. The decision is one of either macro or micro deletion.
To explain, most people know you can delete an entire iMessage thread by simply swiping left on the thread and then choosing “Delete”. This macro deletion approach, in effect, will delete everything that was in the thread and will reclaim any space formerly occupied by photos and videos embedded in that thread.
But did you know that you can actually choose which photos and videos in the thread you want to delete? The primary advantage of the micro deletion approach is that you control what photos and videos get deleted without having to scroll through the entire thread; this is a HUGE time saver on impossibly long threads. The other advantage is that all of the text contained in the iMessage thread is preserved. Win-win!
Here’s how to do it:
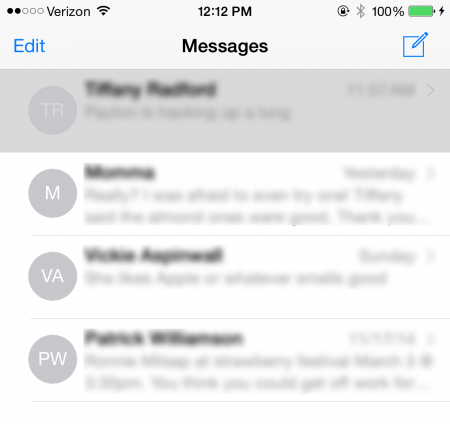
Open the “Messages” app and select one of your conversation threads.
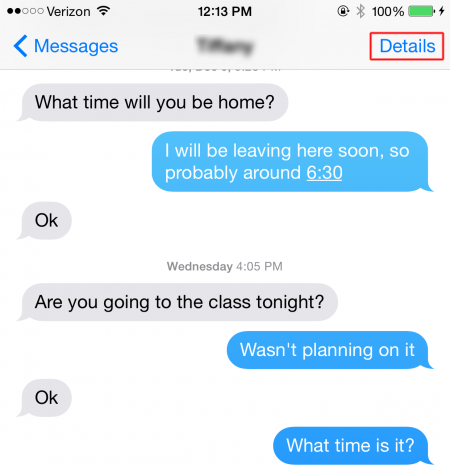
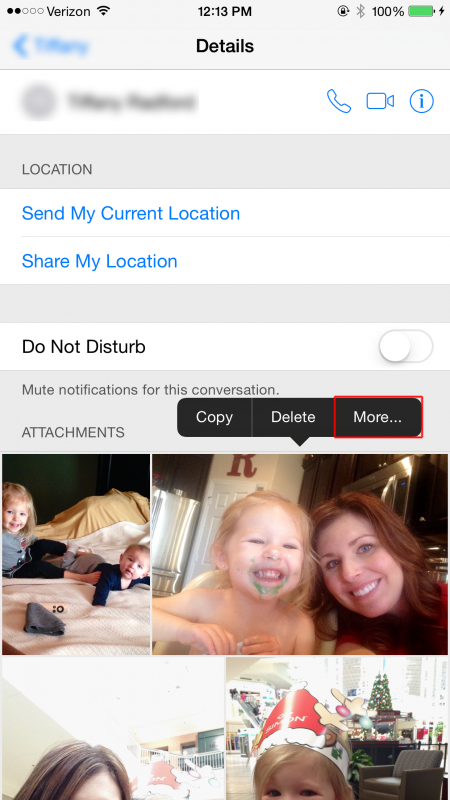
From there, touch the “Details” button to display the thread options.
Once you are on the details screen, touch one of the images and hold it for a few seconds. A small black menu should appear. From there, touch the “More…” button. This will allow you to select photos in the iMessage thread for saving or deletion from the thread.
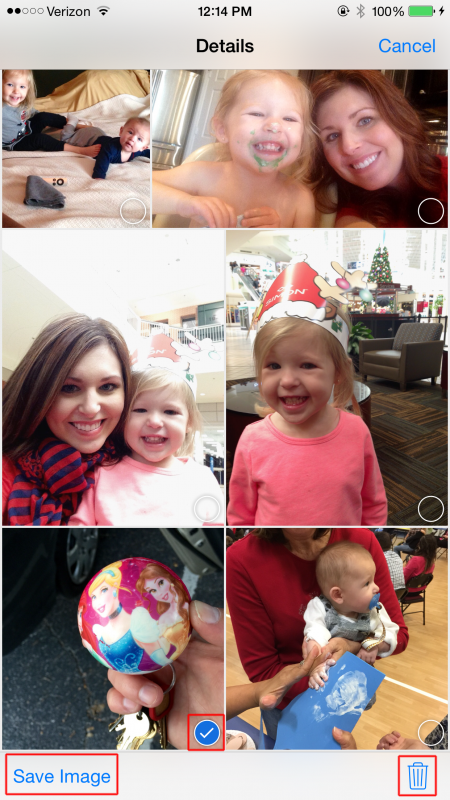
Notice the items highlighted by the red boxes. Select a picture by touching the circle in the bottom right, then select either “Save Image” or touch the trashcan icon to delete. You may select only one photo or every photo.
By using a combination of the micro and macro deletion approaches discussed here, you should be able to quickly free up some additional storage space on your iOS device!
Strategy #2: Move Photos and Videos from iOS to your Computer via iCloud Photo Library
Before you begin you’ll need to enable the iCloud Photo Library on your iOS device by going to Settings–>iCloud–>Photos–>Turn on “iCloud Photo Library (Beta)
If you can’t seem to free up enough storage by pruning your iMessages, one option you might consider is off loading your photos and videos to a computer for safe keeping and then deleting them from your iOS device. One really easy way of doing this is using the newly renovated “iCloud Photo Library” feature on iCloud.com.
With the release of iOS 8, Apple introduced both iCloud Drive and the iCloud Photo Library. While both services are similar in nature, it is iCloud Photo Library that really makes it easy to transfer photos and videos off of your iOS device and on to your computer (and vice versa).
What makes the iCloud Photo Library so powerful is that it mirrors the contents of your “Photos” app in iOS. Practically, this means that whenever you take a photo or video on your iPhone or iPad, the same photo or video is almost instantaneously available for download online at www.icloud.com in your iCloud Photo Library. Even better, you can add photos or videos from your computer to your iOS device via the upload functionality.
Let’s take a quick look at moving files using iCloud Photo Library:
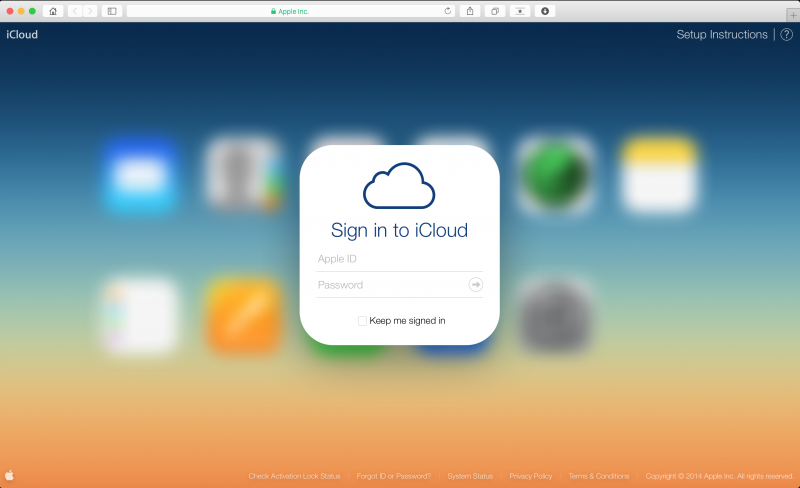
Step 1: Log in to www.icloud.com with your Apple ID
You’ll need your Apple ID credentials to sign in to www.icloud.com.
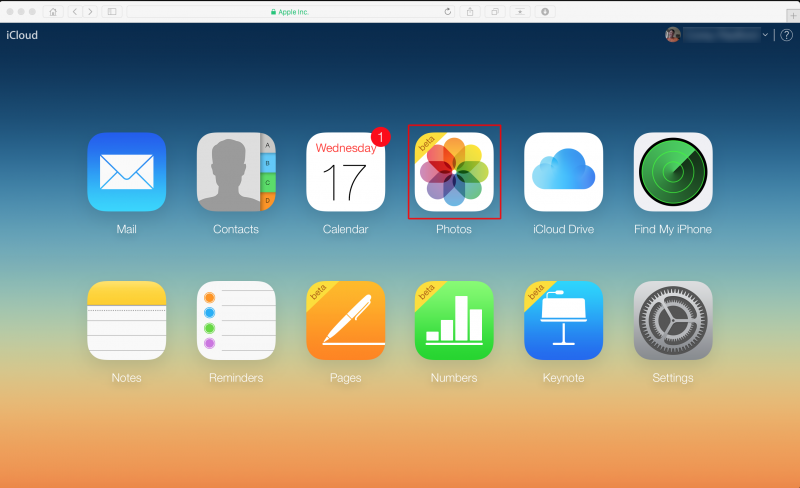
Step 2: Click on the “Photos” icon.
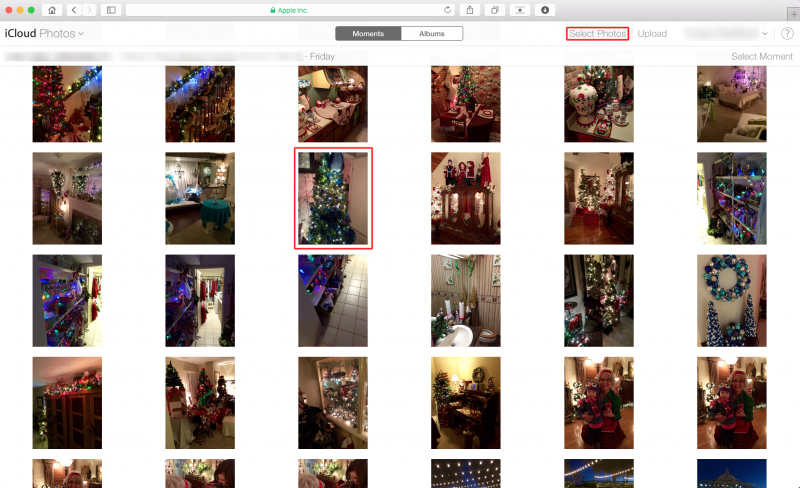
Step 3: Select a single photo or multiple photos to download.
You can choose to select your photos either one at a time or several at once by selecting “Select Photos”.
Once you have selected the photo(s) to download, you’ll want to click on the download symbol highlighted with the red box.
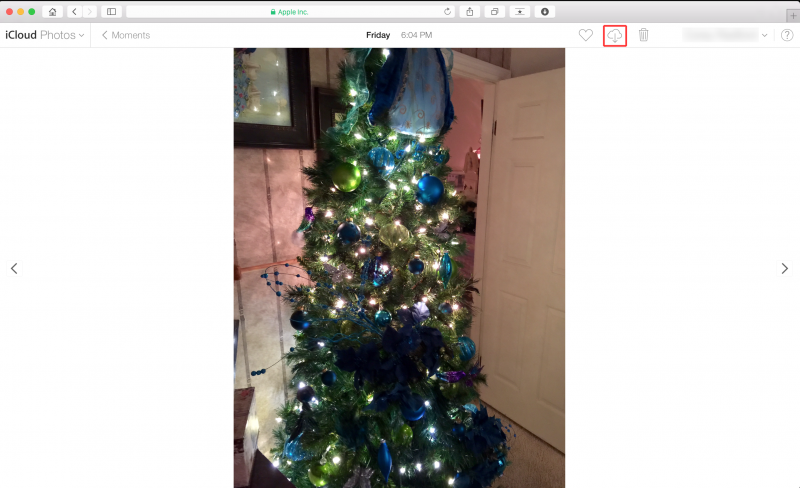
After clicking the download button, the selected photo(s) will be downloaded to your computer. At that point, you can safely delete the photo(s) from your iOS device since the photos and videos you just downloaded are preserved on your computer – just make sure to store it somewhere safe!
Bonus Tip: Uploading photos or videos from your computer to your iOS device(s).
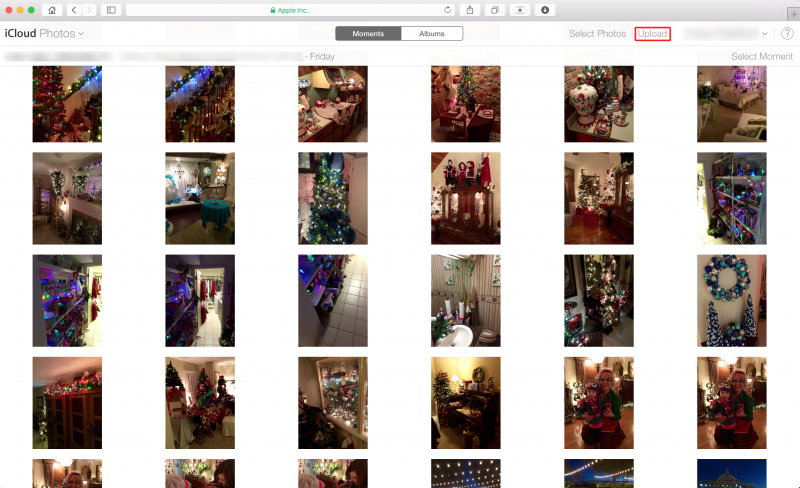
Another GREAT feature of iCloud Photo Library is the ability to upload photos and videos from your computer directly into the “Photos” app on your iOS devices. To do this, navigate back to your iCloud Photo Library online and select “Upload” as highlighted below in red. You will be prompted to locate the files for upload on your computer and then the upload will begin.
Once the upload is completed, you should be able to find the photos or videos in your Photos app on your iOS device. Keep in mind though, that the newly uploaded photos will be organized into your photos app in iOS based on the date that they were taken.
Final Thoughts
My hope is that you now have two solid strategies for freeing up storage space on your iOS device. With the introduction of these new services and features, Apple has provided a great way for all users to continue capturing family memories this holiday season. Merry Christmas!